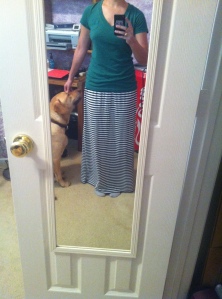
Years ago, I bought 2 maxi dresses at Old Navy. If I remember correctly, they were on clearance, which is why I bought 2 of them. I cannot remember the last time I wore a maxi dress, and a few days ago I found this particular dress hanging in my closet, begging to be worn:
I think the main reason that I rarely wore this dress is because it’s a bit.. revealing. Not like I have a lot going on up top, but I’m not the kind of gal who would show off that much of my ladies in public. The dress is made of jersey fabric, which is really easy to work with because it doesn’t fray – so a little light bulb went off in my brain and I decided to turn this maxi dress into a maxi skirt.
It sounds a lot easier than it was.
I didn’t take very good tutorial pictures for this post, because I was mostly flying by the seat of my pants with this project. But for those who need the step-by-step, I used the following materials:
– Maxi dress found in closet
– Scissors
– 1.5 inch elastic
– Sewing Machine
– Coordinating Thread
– Patience (seriously, this took me over an hour. But it’s raining and Harry Potter is on ABC Family today so I had nothing but time)
I knew that I wanted my skirt to sit just below my belly button, so I took my fabric tape measure and measured 38 inches from my belly button to the floor. I laid the dress on the floor and measured 40 inches from the bottom of the dress (to give myself a little wiggle room) and cut across the dress from one side seam to the next:
My first cutting attempt resulted in this:
Then I was successful – chop!:
I wanted to keep the original seams on the sides and the original hem, so after I cut off the top I was basically left with a 40″ fabric tube.
My original piece of elastic was 1 1/4 yd. long, so I pinned it to make a circle and used it as a guide to make the casing for my elastic. I flipped the tube inside out and folded the raw edge down about 2″ (just over the elastic) and pinned all the way around, leaving about 1/2″ of a raw edge. Once I pinned all the way around, I realized that I had cut my dress crooked and had to re-do the casing for my elastic so that I wouldn’t have a lop-sided skirt. Fail.
Once my pins were situated, I kept the elastic in place and started sewing in a straight line. That’s when I realized that I’m still a little intimidated by my sewing machine and my straight line ended up anything but straight. I had a few (okay fine, several) mess-up spots that I had to go back and correct, which made me thankful that I bought a seam ripper thing the last time I was at Hobby Lobby. I sewed just about all the way around the skirt but kept a small opening so I could pull out the elastic, measure it, cut it, and then thread it back through the casing.
So I did just that – I pulled out the piece of elastic and measured 34″ around the part of my waist where I wanted the skirt to fall. I cut the elastic an inch or so shorter than I measured, so that the skirt would fit snuggly. I put a safety pin on one end of the cut piece of elastic to help thread it through the casing on the skirt and made a quick stitch to sew the raw ends of elastic together. Once the elastic was in place, I stitched up the small opening in the elastic casing that I had made before and voila – I had a skirt!
If you look closely, you will notice that it’s not the prettiest article of clothing ever made, but it’s comfortable and something that I can throw on if I need to run to run errands and haven’t shaved my legs in awhile. For a novice seamstress, I’m quite proud of the finished product! Hopefully I will get more use out of it now!
Thanks for stopping by – have a great day! 🙂


Success!!!
I love this! Great job! 🙂